
The Complete Guide to Growing Curly Kale from Seeds in Your Home Garden. Learn how To easily grow curly kale from seeds in your own home garden with this complete guide. Discover simple steps & tips for success. Start enjoying homegrown, nutritious kale today!
The Complete Guide to Growing Curly Kale
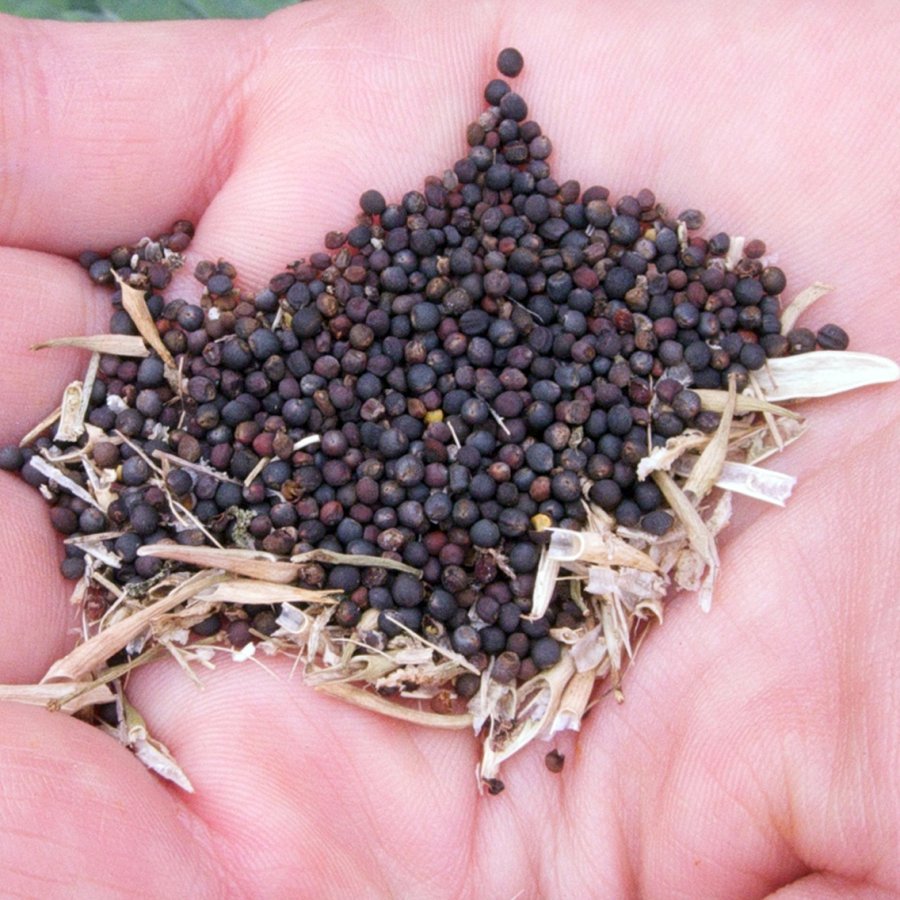
Choosing The Right Seeds
When starting your journey To grow curly kale in your home garden, it is crucial To choose The right seeds. Look for high-quality organic, non-GMO seeds that will ensure a healthy & thriving kale crop. I personally recommend these curly kale seeds available on Amazon.
These seeds are known for their reliability & excellent germination rates. They also come in a pack of 100, providing you with plenty of seeds To start your kale garden.
Remember To follow The instructions on The seed packet regarding planting depth & spacing requirements. This will ensure that your kale plants have enough room To grow & develop.
Preparing The Soil
Curly kale thrives in well-drained, fertile soil. Before planting your seeds, prepare The soil by removing any weeds or debris & loosening it with a garden fork or tiller. Incorporate organic matter such as compost or well-rotted manure To improve The soil’s fertility.
It is also essential To keep The soil pH between 6.0 & 7.5, as kale prefers slightly acidic To neutral soil. You can test your soil’s pH using a simple soil testing kit or by sending a sample To a local agricultural extension office.
Once you have prepared The soil, rake The surface To create a smooth & even bed for planting your kale seeds.
Sowing The Seeds
Now that you have chosen your seeds & prepared The soil, it’s time To sow The kale seeds. Pick a sunny spot in your garden that receives at least 6-8 hours of sunlight daily.
Plant The seeds at a depth of ¼ To ½ inch & space them about 12-18 inches apart. You can sow them directly in The garden bed or start them indoors in seed trays & transplant them later.
After planting, lightly water The seeds To ensure good soil contact, but be careful not To overwater them. Keep The soil consistently moist, & within a week or two, you will see The first signs of sprouting.
Providing Care & Maintenance
As your curly kale plants begin To grow, it’s essential To provide them with proper care & maintenance To ensure a bountiful harvest.
Water The plants regularly, aiming To keep The soil consistently moist. However, be cautious not To overwater, as this can lead To root rot. Mulching around The plants can help retain moisture & suppress weed growth.
Fertilize your kale plants every 4-6 weeks with a balanced organic fertilizer To provide them with The nutrients they need. Avoid using synthetic fertilizers high in nitrogen, as they can cause an excess of leafy growth & make The kale more susceptible To pests.
Regularly inspect your plants for signs of pests such as aphids or cabbage worms. If you notice any infestation, use natural pest control methods like handpicking or introducing beneficial insects To your garden.
Harvesting & Enjoying Your Kale
Curly kale is typically ready for harvest 55-75 days after planting, depending on The variety & growing conditions. You can start harvesting The outer leaves when they reach a length of 8-10 inches. Simply snip The leaves off The plant, leaving The central bud intact for continued growth.
Harvesting The outer leaves encourages new growth, allowing you To enjoy a continuous harvest throughout The growing season.
Once harvested, curly kale can be used in a variety of delicious & nutritious recipes. From salads & smoothies To soups & stir-fries, The possibilities are endless. Get creative in The kitchen & experiment with different ways To incorporate this nutrient-packed green into your meals.
My Personal Experience Growing Curly Kale
As an avid gardener, I have had great success growing curly kale in my own home garden. The process is relatively straightforward & rewarding. From sowing The seeds To watching The plants flourish & harvesting The vibrant green leaves, it’s a fulfilling experience.
I love The versatility of curly kale in The kitchen & enjoy experimenting with various recipes. Its rich flavor & robust texture make it a fantastic addition To any dish. Whether sautéed with garlic, added To smoothies, or used as a crispy topping in salads, curly kale never fails To impress.
🌱 Features of “The Complete Guide To Growing Curly Kale from Seeds in Your Home Garden” 🌱
- Step-by-step instructions for growing curly kale
- Tips for choosing The right seeds
- Preparing The soil for optimal growth
- Sowing The seeds & ensuring proper germination
- Care & maintenance techniques for healthy kale plants
- Harvesting & enjoying your homegrown kale
- Delicious recipe ideas using curly kale
Additional Tips for Growing Curly Kale
Here are a few additional tips To help you succeed in growing curly kale:
- Provide adequate spacing between plants To allow for proper air circulation & prevent diseases.
- Consider using row covers or netting To protect your kale plants from pests like birds or insects.
- Rotate your kale crop every year To prevent The build-up of pests & diseases in The soil.
Why Choose Dwarf Green Curled Kale?
If you’re looking for a specific variety of curly kale To grow, I highly recommend The Dwarf Green Curled Kale. This variety, available from High Mowing Organic Seeds, is known for its compact size & tender, flavorful leaves.
Dwarf Green Curled Kale is perfect for smaller gardens or containers, making it an excellent choice for urban gardeners or those with limited space. It is also more resistant To cold temperatures, allowing you To enjoy fresh kale even during The cooler months.
Now that you have all The information you need, it’s time To get started on your journey To grow curly kale from seeds in your home garden. Enjoy The process, reap The rewards, & savor The delicious taste of freshly harvested kale!
How To Grow Curly Kale from Seeds in Your Home Garden
Growing curly kale from seeds in your home garden is a rewarding & satisfying experience. Not only is kale a nutritious & versatile vegetable, but it is also relatively easy To grow. In this guide, we will walk you through The step-by-step process of growing curly kale from seeds in your own backyard.
Choosing The Right Varieties of Curly Kale
Before you start growing curly kale, it’s important To choose The right variety for your garden. Two popular varieties of curly kale are Dwarf Blue Curled Organic & Alive Vates. Dwarf Blue Curled Organic is a compact variety with curly, bluish-green leaves. Alive Vates is a vigorous & hardy variety with dark green, curly leaves. Both varieties are rich in nutrients & have excellent flavor.
If you’re just starting out, you might want To consider purchasing seeds from a reputable supplier like Ferry Morse or Nature & Nurture Seeds. These companies offer high-quality kale seeds that are specifically suited for home gardeners.
Preparing The Soil for Planting
Curly kale thrives in well-drained soil that is rich in organic matter. Start by preparing The soil by removing any weeds or rocks. Loosen The soil with a garden fork or tiller, making sure To break up any clumps. Add compost or well-rotted manure To improve The soil’s fertility & structure.
It’s also a good idea To test The soil’s pH level. Kale prefers slightly acidic soil with a pH range of 6.0 To 6.8. If your soil is too alkaline, you can use sulfur To lower The pH level. If it’s too acidic, you can use lime To raise The pH level. Follow The instructions on The soil test kit To determine The appropriate amounts of sulfur or lime To use.
Click here To purchase Dwarf Blue Curled Organic seeds from Ferry Morse.
Sowing The Seeds
Once you have prepared The soil, it’s time To sow The kale seeds. Choose a sunny spot in your garden, as kale requires at least 6 hours of direct sunlight per day. Using a garden rake, create shallow furrows in The soil, about 1/4 inch deep & 12 inches The Complete Guide to Growing Curly Kale.
Place The kale seeds inThe Complete Guide to Growing Curly KaleThe furrows, spacing them about 2 inches apart. Cover The seeds with a thin layer of soil & gently firm it down. Water The seeds thoroughly, making sure The soil is evenly moist. Keep The soil consistently moist during The The Complete Guide to Growing Curly Kaleperiod, which usually takes 7 To 14 days.
Transplanting Seedlings
Once The kale seedlings have grown To about 3 To 4 inches tall, it’s time To transplant them into your garden. Choose a The Complete Guide to Growing Curly Kaleday or transplant in The late afternoon To minimize stress To The The Complete Guide to Growing Curly Kale.
Dig holes in The prepared soil, spacing them about 12 To 18 inches apart. Carefully remove The seedlings from their containers, taking care not To damage The roots. Place each seedling in a hole & gently firm The soil around it. Water The transplanted seedlings thoroughly To help them settle into their new environment.
Click here To purchase Alive Vates seeds from Nature & Nurture Seeds
Caring for Your Kale Plants
Kale plants require regular care To ensure healthy growth & abundant harvest. Here are some guidelines To follow:
- – Watering: Keep The soil consistently moist, but not soggy. Water deeply once a week, or more frequently during hot & dry periods.
- – Mulching: Apply a layer of organic mulch around The base of The plants To conserve moisture, suppress weeds, & regulate soil temperature.
- – Fertilizing: Kale is a nutrient-hungry plant. Apply a balanced fertilizer once a month To provide The necessary nutrients for healthy growth.
- – Pest Control: Keep an eye out for common pests like aphids, cabbage worms, & slugs. Use organic pest control methods or companion planting To deter pests.
- – Harvesting: You can start harvesting kale leaves once they reach a usable size, usually around 8 To 10 weeks after planting. Pick The outer leaves first, leaving The inner leaves To continue growing.
Comparing Kale Varieties
| Variety | Characteristics | Emoji |
|---|---|---|
| Dwarf Blue Curled Organic | Compact with curly, bluish-green leaves | 🌱 |
| Alive Vates | Vigorous & hardy with dark green, curly leaves | 🌿 |
Both varieties of curly kale have their own unique characteristics & flavors. Choose The one that best suits your taste & growing conditions.
Growing curly kale from seeds in your The Complete Guide to Growing Curly Kalegarden can be a rewarding experience. By following this complete guide, you’ll be able To enjoy a bountiful harvest of nutritious & delicious kale. Remember To choose The right variety, prepare The soil properly, sow The seeds, & provide care & maintenance To ensure healthy growth. Happy gardening!
On a personal noteThe Complete Guide to Growing Curly Kale, I have successfully grown curly kale in my own backyard & it has become one of my favorite vegetables To harvest & cook with. The taste & texture of fresh kale leaves are incomparable To store-bought ones. I highly The Complete Guide to Growing Curly Kalegiving it a try!
How To start growing curly kale from seeds?
To begin growing curly kale from seeds, you need To prepare The soil by loosening it & removing any weeds or debris. The Complete Guide to Growing Curly Kale, make small furrows in The soil & plant The kale seeds about 1 inch deep & 12 inches apart. Water The seeds The Complete Guide to Growing Curly Kale, & ensure they receive adequate sunlight for proper growth.
What is The ideal growing temperature for curly kale?
Curly kale thrivesThe Complete Guide to Growing Curly Kalein cool weather conditions. It grows best when The temperature ranges between 60°F & 75°F (15°C & 24°C). Ensure that The plants are not exposed To extreme heat, as it can cause bolting & decrease The quality of The kale leaves.
How often should I water my curly kale plants?
It is essential To keep The soil evenly moist for curly kale plants. Water them regularly, aiming To provide about 1 inch of water per week. The Complete Guide to Growing Curly Kale, ensure The soil has good drainage To avoid waterlogged conditions, as excessive The Complete Guide to Growing Curly Kalecan lead To diseases & root rot.
When is The best time To harvest curly kale?
You can start harvesting curly kale when The leaves reach The desired size, usually around 8 To 10 weeks after planting. Pick The outer leaves firstThe Complete Guide to Growing Curly Kale, allowing The inner ones To continue growing. Harvesting in The morning, when The leaves are crisp, is The Complete Guide to Growing Curly Kalefor The best flavor & nutritional value.
How can I protect my curly kale plants from pests & diseases?
To protect your curly kale plants from pests, you can use organic pest control methods such as applying neem oil or using insecticidal soap. Regularly inspect The plants for any signs of infestation & promptly take action. Also, practice crop rotation & avoid overwatering To prevent diseases like downy mildew.
Conclusion
In conclusion, growing curly kale from seeds in your home garden is a rewarding & enjoyable experience. By following The simple steps outlined in this The Complete Guide to Growing Curly Kale, you can successfully cultivate this nutritious & versatile leafy green in your own backyard.
Throughout The The Complete Guide to Growing Curly Kale, remember To maintain a conversational tone & use simple language To make The The Complete Guide to Growing Curly Kaleaccessible To all readers, whether they are seasoned gardeners or beginners. Avoiding jargon & complex terms will help ensure that The information is easily understood & applied.
Starting from seed, you’ll begin by preparing The soil & planting The seeds at The right depth. Consistent watering, proper The Complete Guide to Growing Curly Kale, & regular fertilization will help your kale plants thrive. As they grow, make sure To keep an eye out for any pests or diseases & take appropriate measures To prevent or treat them.
Harvesting your curly kale can be done by picking individual leaves or cutting The whole plant from The base. Remember To leave some leaves intact, so The plant can continue To produce for a longer period.
Once you’ve harvested your kale, you can enjoy it in a variety of delicious & nutritious dishes. From salads To stir-fries, soups To smoothies, curly kale adds a vibrant & distinct flavor To any meal.
By growing curly kale in The Complete Guide to Growing Curly Kalehome garden, you not only have access To a fresh & reliable source of this superfood but also contribute To a more sustainable & eco-friendly lifestyle. The satisfaction of The Complete Guide to Growing Curly Kaleyour own food cannot be measured, & The health benefits of fresh kale are immense.
So, get your seeds, prepare your garden, & embark on this fulfilling journey of growing curly kale. With patience, care, & The Complete Guide to Growing Curly KaleThe guidelines provided, you will soon be able To enjoy The fruits of your labor & savor The taste of The Complete Guide to Growing Curly Kalecurly kale. Happy gardening!